24 Halloween Paper Crafts That Will Keep Your Kids entertained for Hours
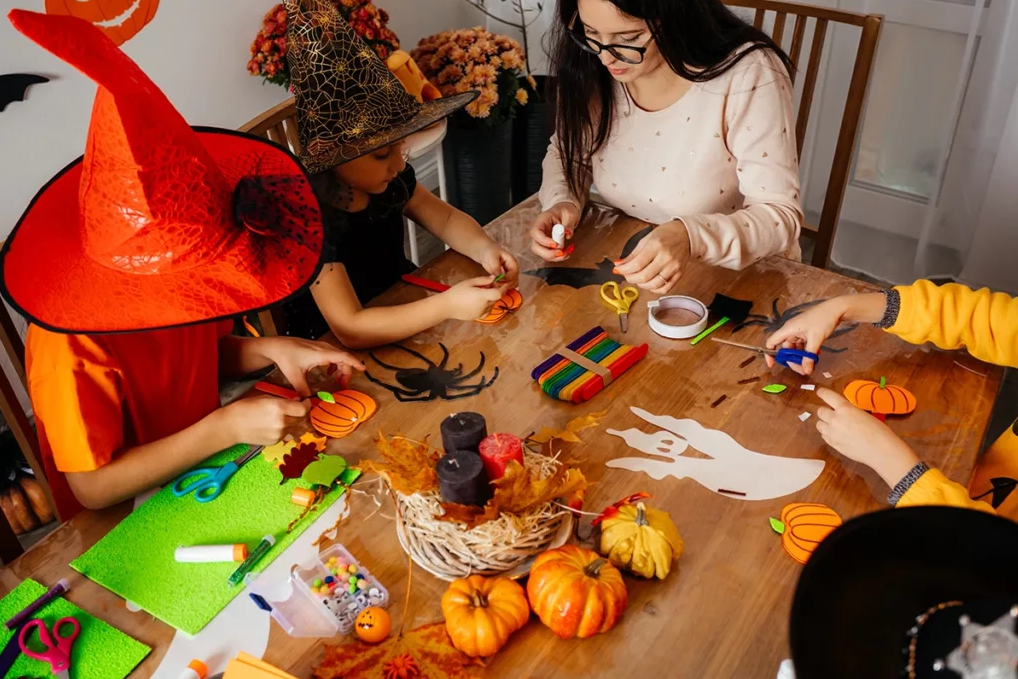
With Halloween just around the corner, it’s time to start thinking about ways to keep your kids entertained. Why not try some fun paper crafts? In this blog post, we will share 24 different ideas that will keep your little ones busy for hours! We have something for everyone, from ghosts and goblins to spiders and jack-o’-lanterns! So get ready to get crafty and have some Halloween fun!
Spider Paper Plate Craft
This spider paper plate craft is perfect for a Halloween party or simply to have some spooky fun! You only need a paper plate, black paint, and pipe cleaners.
To start, paint the paper plate black. Once the paint is dry, cut eight legs out of the plate (four on each side). Next, take two pipe cleaners and twist them together in the middle to create the spider’s body. Finally, glue or tape the legs and body onto the plate. Your spider paper plate craft is now complete! You can use it as a decoration or even play with it like.
Watch this YouTube tutorial on how to make a spider paper plate:
Halloween Monsters Paper Rings
These Halloween monster paper rings are a fun and easy way to add some spooky fun to your party! All you need is some construction paper, scissors, and tape.
To start, cut eight strips of construction paper (four for each ring). Next, take two strips and tape them together at one end to form a loop. Repeat this step with the remaining strips. Now you have four paper rings! To finish, decorate each ring with eyes, mouth, and any other details you like. Your Halloween monsters paper rings are now ready to wear!
Watch this tutorial by Easy Peasy and Fun:
Ghost In A Pumpkin Craft
The Ghost in a Pumpkin Craft is easy to assemble and can be used as a Halloween decoration. All you need is a white sheet, a black marker, and a pumpkin.
To start, draw a ghost face on the white sheet with a black marker. Next, cut out the ghost’s face. Finally, place the ghost’s face inside the pumpkin. Your Ghost in a Pumpkin Craft is now complete! You can use it as decoration or play with it like a puppet.
Watch this tutorial from Paper Magic:
Origami Halloween Bat
This origami Halloween bat is a fun and easy way to add some spooky fun to your holiday! All you need is a square piece of paper and some black paint.
To start, fold the paper in half to create a triangle. Next, fold the triangle in half again to create a smaller triangle. Finally, cut out two small wings from the side of the triangle.
Watch this tutorial by Hello Origami:
Witch Hat Origami
This origami witch hat is an exciting way to spend your Halloween with kids. All you need is a square piece of paper and some black paint.
To start, fold the paper in half to create a triangle. Next, cut out a small semicircle from the top of the triangle. Finally, fold up the bottom point of the triangle to create the witch hat brim. Your origami witch hat is now complete! You can use it as decoration or play with it like a toy.
Watch this origami witch hat tutorial by Paper Kawaii:
Paper Bat Cupcake Toppers
Cupcake toppers don’t have to be boring! These paper bat cupcake toppers are a fun and easy way to add some spooky fun to your Halloween party. All you need is some black paper, scissors, and tape.
To start, cut out four bat wings from the black paper. Next, take two wings and tape them together at the base. Repeat this step with the remaining two wings. Now you have two paper bats! To finish, tape a toothpick or popsicle stick to the back of each bat. Your paper bat cupcake toppers are now ready to use!
Watch this tutorial by the Little Crafties:
Paper Halloween Wreath
Halloween wreaths bring a touch of frightful fun to any home! This paper Halloween wreath is easy to make and can be used as decoration or play. All you need is some black paper, scissors, and tape.
To start, cut out twelve strips of black paper. Next, take two strips and tape them together at one end to form a loop. Repeat this step with the remaining strips.
Watch this tutorial by Craftastic to learn more:
Paper Mask Craft
Your little one will truly look the part of a Halloween monster with this paper mask craft! All you need is some construction paper, scissors, and glue.
To start, have your child draw a scary face on a piece of construction paper. Next, have them cut out their mask shape. Finally, help them glue the mask to a popsicle stick or straw. Your child’s paper mask is now complete! They can wear it around the house or use it to scare their friends!
Watch this tutorial by Nelufa Crafts:
Halloween Shooter Toys
Shooter toys are perfect for shooting competitions by kids aged between 5 and 13 years. They are easy to make and can be great fun for the whole family. All you need is some paper, scissors, and tape.
To start, cut out twelve circles from paper. Next, take two circles and tape them together at the edge to form a cone. Repeat this step with the remaining circles. Now you have six paper cones! To finish, tape the cones together at the base to form a shooter toy. Your Halloween shooter toy is now complete! Have fun shooting ghosts, spiders, and other Halloween creatures!
Watch this tutorial by Red Ted Arts:
Paper Spinning Ghosts
This simple craft with very little prep works great for elementary school classrooms. To make it you’ll need some white paper, scissors, and a black marker.
Have your child cut out a spiral ghost shape from the white paper. Next, help them cut out a small circle from the center of the ghost. Finally, use the black marker to draw eyes and a mouth on the ghost. Your child can now hold the ghost by the small circle and spin it around! They can also use it as decoration or to play with their friends.
Watch this tutorial by Conyers-Rockdale Library:
Colorful Pumpkin Garlands
These pumpkin garlands are a fun and easy way to decorate for Halloween! All you need is some construction paper, scissors, and tape.
To start, cut out twelve pumpkin shapes from construction paper. Next, take two pumpkins and tape them together at the top. Repeat this step with the remaining pumpkins. Now you have six pumpkin garlands! To finish, tape the garlands together to form a longer garland. Your colorful pumpkin garland is now complete! Hang it up and enjoy!
Watch this tutorial by Tripta:
Gorgeous Paper Pumpkins
Are your kids a fun of pumpkins? Here is a very unique and different way to make them with paper. This would be a great decoration in the house or can also be used as a play.
Follow tutorial from Hobbycraft to make gorgeous honeycomb paper pumpkins.
Paper Cone Witch
This DIY project offers an easy and creative way to make a unique paper decoration for Halloween. The materials required for the project include black construction paper, a ruler, scissors, a pencil, glue, and optional decorative elements.
For those who want to add a spooky touch, Additional decorative elements like spiders or bats can be added for a spooky touch. By following these instructions, create your own unique and eerie paper decoration for Halloween.
Spooky Paper Lanterns
These spooky paper lanterns are a fun and easy way to decorate for Halloween! All you need is some black paper, scissors, and a stapler.
To start, cut out twelve lantern shapes from black paper. Next, take two lanterns and staple them together at the top. Repeat this step with the remaining lanterns.
Watch this tutorial by Awesomely Crafty:
Googly-Eyed Paper Pumpkin
Your kids will have so much fun making this googly-eyed paper pumpkin! All you need is some orange paper, black construction paper, scissors, glue, and googly eyes.
Have your child cut out a pumpkin shape from the orange paper. Next, help them cut out a stem and leaves from the black construction paper. Finally, glue the stem and leaves to the pumpkin and add googly eyes.
Read these steps on how to make a googly-eyed paper pumpkin by designimprovised.com
Spider Web Sun Catcher
This spider web sun catcher is a fun and easy craft for kids! All you need is some black paper, scissors, and glue.
Have your child cut out a spider web shape from black paper. Next, help them cut out small spiders from the black paper. Finally, glue the spiders onto the spider web. Your child’s spider web sun catcher is now complete! Hang it up in a window and enjoy!
Watch this tutorial by Happy Toddler Playtime Crafts & Activities for Kids:
Paper Owl Craft
Owls symbolize wisdom, so what better way to start off the school year than with this paper owl craft? All you need is some construction paper, scissors, and glue.
To start, cut out an owl shape from construction paper. Next, help your child cut out smaller owls from the construction paper. Finally, glue the small owls onto the large owl.
Watch this tutorial by Suchi Creative Crafts:
Funky Toilet Paper Roll Owls
This paper craft finally gives your toilet paper rolls a use! All you need is some toilet paper rolls, construction paper, scissors, glue, and googly eyes.
To start, cut out owl shapes from construction paper. Next, help your child cut out smaller owls from the construction paper. Finally, glue the small owls onto the large owl. With the toilet paper rolls, cut out wings, beaks, and feet. Glue these onto the owls. Finish by adding googly eyes.
Watch this tutorial by Ventuno art:
Hanging Paper Bats
Making hanging paper bats will surely give your kids a spooky feeling! All you need is some black paper, scissors, and tape.
To start, cut out bat shapes from black paper. Next, take two bats and tape them together at the top. Repeat this step with the remaining bats. Finally, hang up your bats and enjoy!
Watch this tutorial by Sophiesworldvideo:
Paper Plate Ghost Craft
This paper plate ghost craft is a fun and easy way to decorate for Halloween! All you need is a paper plate, black construction paper, scissors, and glue.
Have your child cut out a ghost shape from the paper plate. Next, help them cut out two eyes and a mouth from the black construction paper. Finally, glue the eyes and mouth onto the ghost.
Watch this tutorial by Fun Activities For Kids:
Crepe Paper Bat Banners
Crepe papers are commonly used for decorations because of its texture. It can be easily manipulated to create 3D designs. To make crepe paper bat banners, start by cutting out bat shapes from black crepe paper. Make sure to cut out two bats for each banner. Next, take one of the bats and make a small cut at the top. Repeat this step with the remaining bats.
Now take two bats and insert the small cut of one bat into the small cut of the other bat. Secure it by stapling the two bats together. Repeat this step until all the bats are stapled together. Finally, hang up your banners and enjoy!
Watch this tutorial by Tikkido:
Halloween Paper Envelope
This craft is a great way to use up those extra pieces of paper lying around! All you need is some orange paper, black construction paper, scissors, and glue.
How do you make the envelope? Start by folding the orange paper in half. Next, cut out a pumpkin shape from the black construction paper. Glue the pumpkin onto the front of the envelope. Finally, decorate the envelope with whatever you like! You can use this envelope to send a letter to a friend or family member. Or you can use it to store some Halloween candy!
Watch this tutorial by Snail Mail Ideas:
Paper Plate Pumpkin Craft
This pumpkin craft is a fun and easy way to decorate for Halloween! All you need is a paper plate, orange construction paper, black construction paper, scissors, and glue.
To start, cut out a pumpkin shape from the orange construction paper. Next, help your child cut out eyes and a mouth from the black construction paper. Finally, glue the eyes and mouth onto the pumpkin. Finish by adding some leaves or other decorations if you like!
Watch this tutorial by Easy Peasy and Fun:
Conclusion
Paper crafts are a great way to spend time with your kids and decorate for the holidays! With just a few supplies, you can make some really fun and festive crafts. So get creative and have fun! Check out our Halloween collections at Callie if you want more gift ideas this festive season.


